
How to Start Seeds for Hydroponic Gardening
Share
Welcome to the world of indoor hydroponic gardening with DPROOTS! Starting seeds is the first exciting step towards growing your own fresh produce right at home. In this guide, we'll walk you through the simple process of 育苗 (starting seeds) for your hydroponic system.
1. Seed Soaking

The first crucial step is to soak your seeds. Soaking helps to speed up the germination process by softening the seed coat and allowing the embryo inside to absorb water more easily. Most seeds should be soaked in clean, room - temperature water for 6 - 12 hours. However, different seeds have different requirements:
- Lettuce Seeds: These small seeds only need to be soaked for about 6 - 8 hours. Soaking them for too long can actually be harmful.
- Tomato Seeds: Tomato seeds benefit from a 12 - hour soak. This helps to break dormancy and get them ready to sprout.
- Basil Seeds: Soak basil seeds for around 8 - 10 hours. They are relatively small, and this soaking time is sufficient to kick - start the germination process.
- Pepper Seeds: Pepper seeds, especially larger varieties, do well with a 12 - hour soak. It helps them absorb enough moisture to begin growing.
2. Preparing the Growing Medium and Planting Seeds

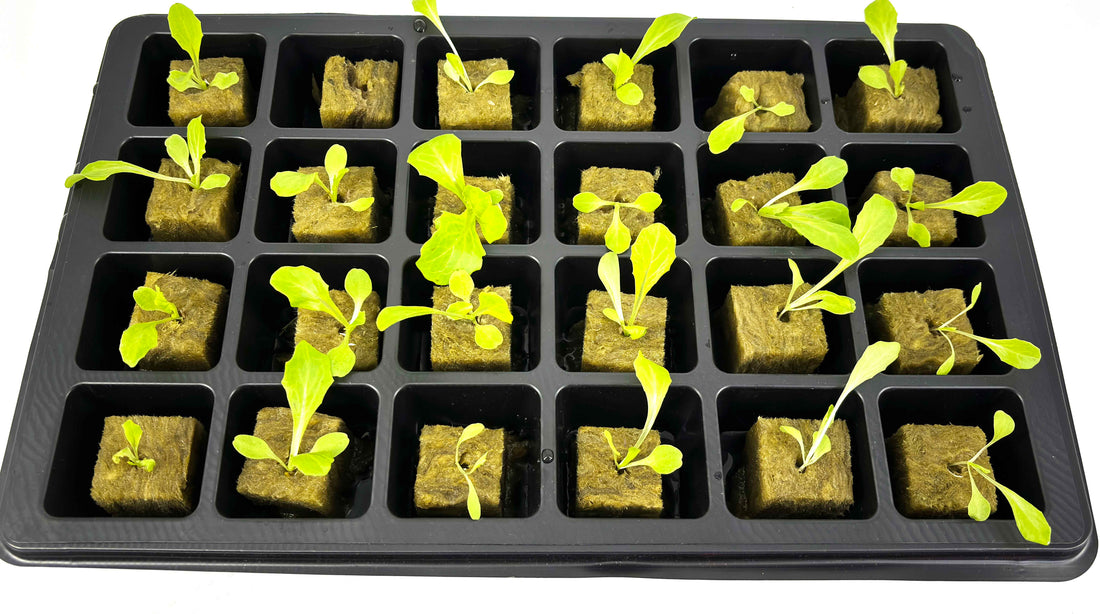
After soaking, it's time to prepare the growing medium. We recommend using either planting sponges or rockwool.
- Soak the Growing Medium: Fully submerge the planting sponges or rockwool in water. Make sure they absorb enough water to be thoroughly saturated. For rockwool, you may need to soak it in a slightly acidic solution (pH around 5.5 - 6.5) to adjust its natural alkalinity, which can be harmful to seedlings.
- Plant the Seeds: Once the growing medium is ready, place the soaked seeds into the planting sponges. It's a good idea to plant 2 - 3 seeds in each sponge. This gives you a better chance of having at least one strong seedling. For example, if you're using square planting sponges, make a small indentation in the center of each sponge and gently place the seeds inside.
3. Germination Stage

Now, it's time to wait for the seeds to germinate. Place the planted sponges in a warm, dark place. You can cover them with a plastic wrap or a clear lid to maintain humidity. Keep the sponges or the paper towels (if you're using them to cover the seeds for added moisture) moist.
- Moisture Maintenance: Check the moisture level frequently. You can mist the sponges with water using a spray bottle. The goal is to keep the growing medium damp but not waterlogged.
- Germination Time: In about 2 - 3 days, you should start to see tiny sprouts emerging from the seeds. This is an exciting moment as it means your seeds are on their way to becoming healthy plants.
4. Transplanting into the Hydroponic System

Once the seedlings have developed a few sets of true leaves and are strong enough to handle, it's time to transplant them into your hydroponic system.
- Careful Transplanting: Gently remove the seedlings from the planting sponges. Try not to damage the delicate roots. Place them in the appropriate growing sites in your hydroponic system. For example, if you have a Deep Water Culture (DWC) system, you can place the seedlings in net pots filled with a small amount of growing medium (like expanded clay pellets) and then suspend the net pots in the nutrient solution.
- Initial Adjustment: After transplanting, keep a close eye on the seedlings. They may take a day or two to adjust to their new environment.
5. Post - Transplant Care

To ensure your seedlings grow into healthy, productive plants, you need to provide them with the right conditions.
- Water and Nutrient Management: Keep the hydroponic system filled with enough water and a balanced nutrient solution. Replace or top - up the nutrient solution every 1 - 2 weeks. Make sure the water level is appropriate for your specific hydroponic setup.
- Light Requirements: Provide your plants with 8 - 12 hours of light per day. You can use fluorescent grow lights, LED grow lights, or natural sunlight if it's available. Position the lights about 6 - 12 inches above the plants to ensure they get enough light without getting burned.
- Oxygenation: Oxygen is essential for root health. In a hydroponic system, make sure there is good oxygen circulation in the nutrient solution. This can be achieved through the use of air stones or a well - designed water circulation system.
By following these simple steps, you'll be well on your way to growing a thriving hydroponic garden with DPROOTS. Happy gardening!